
Claude Desktop
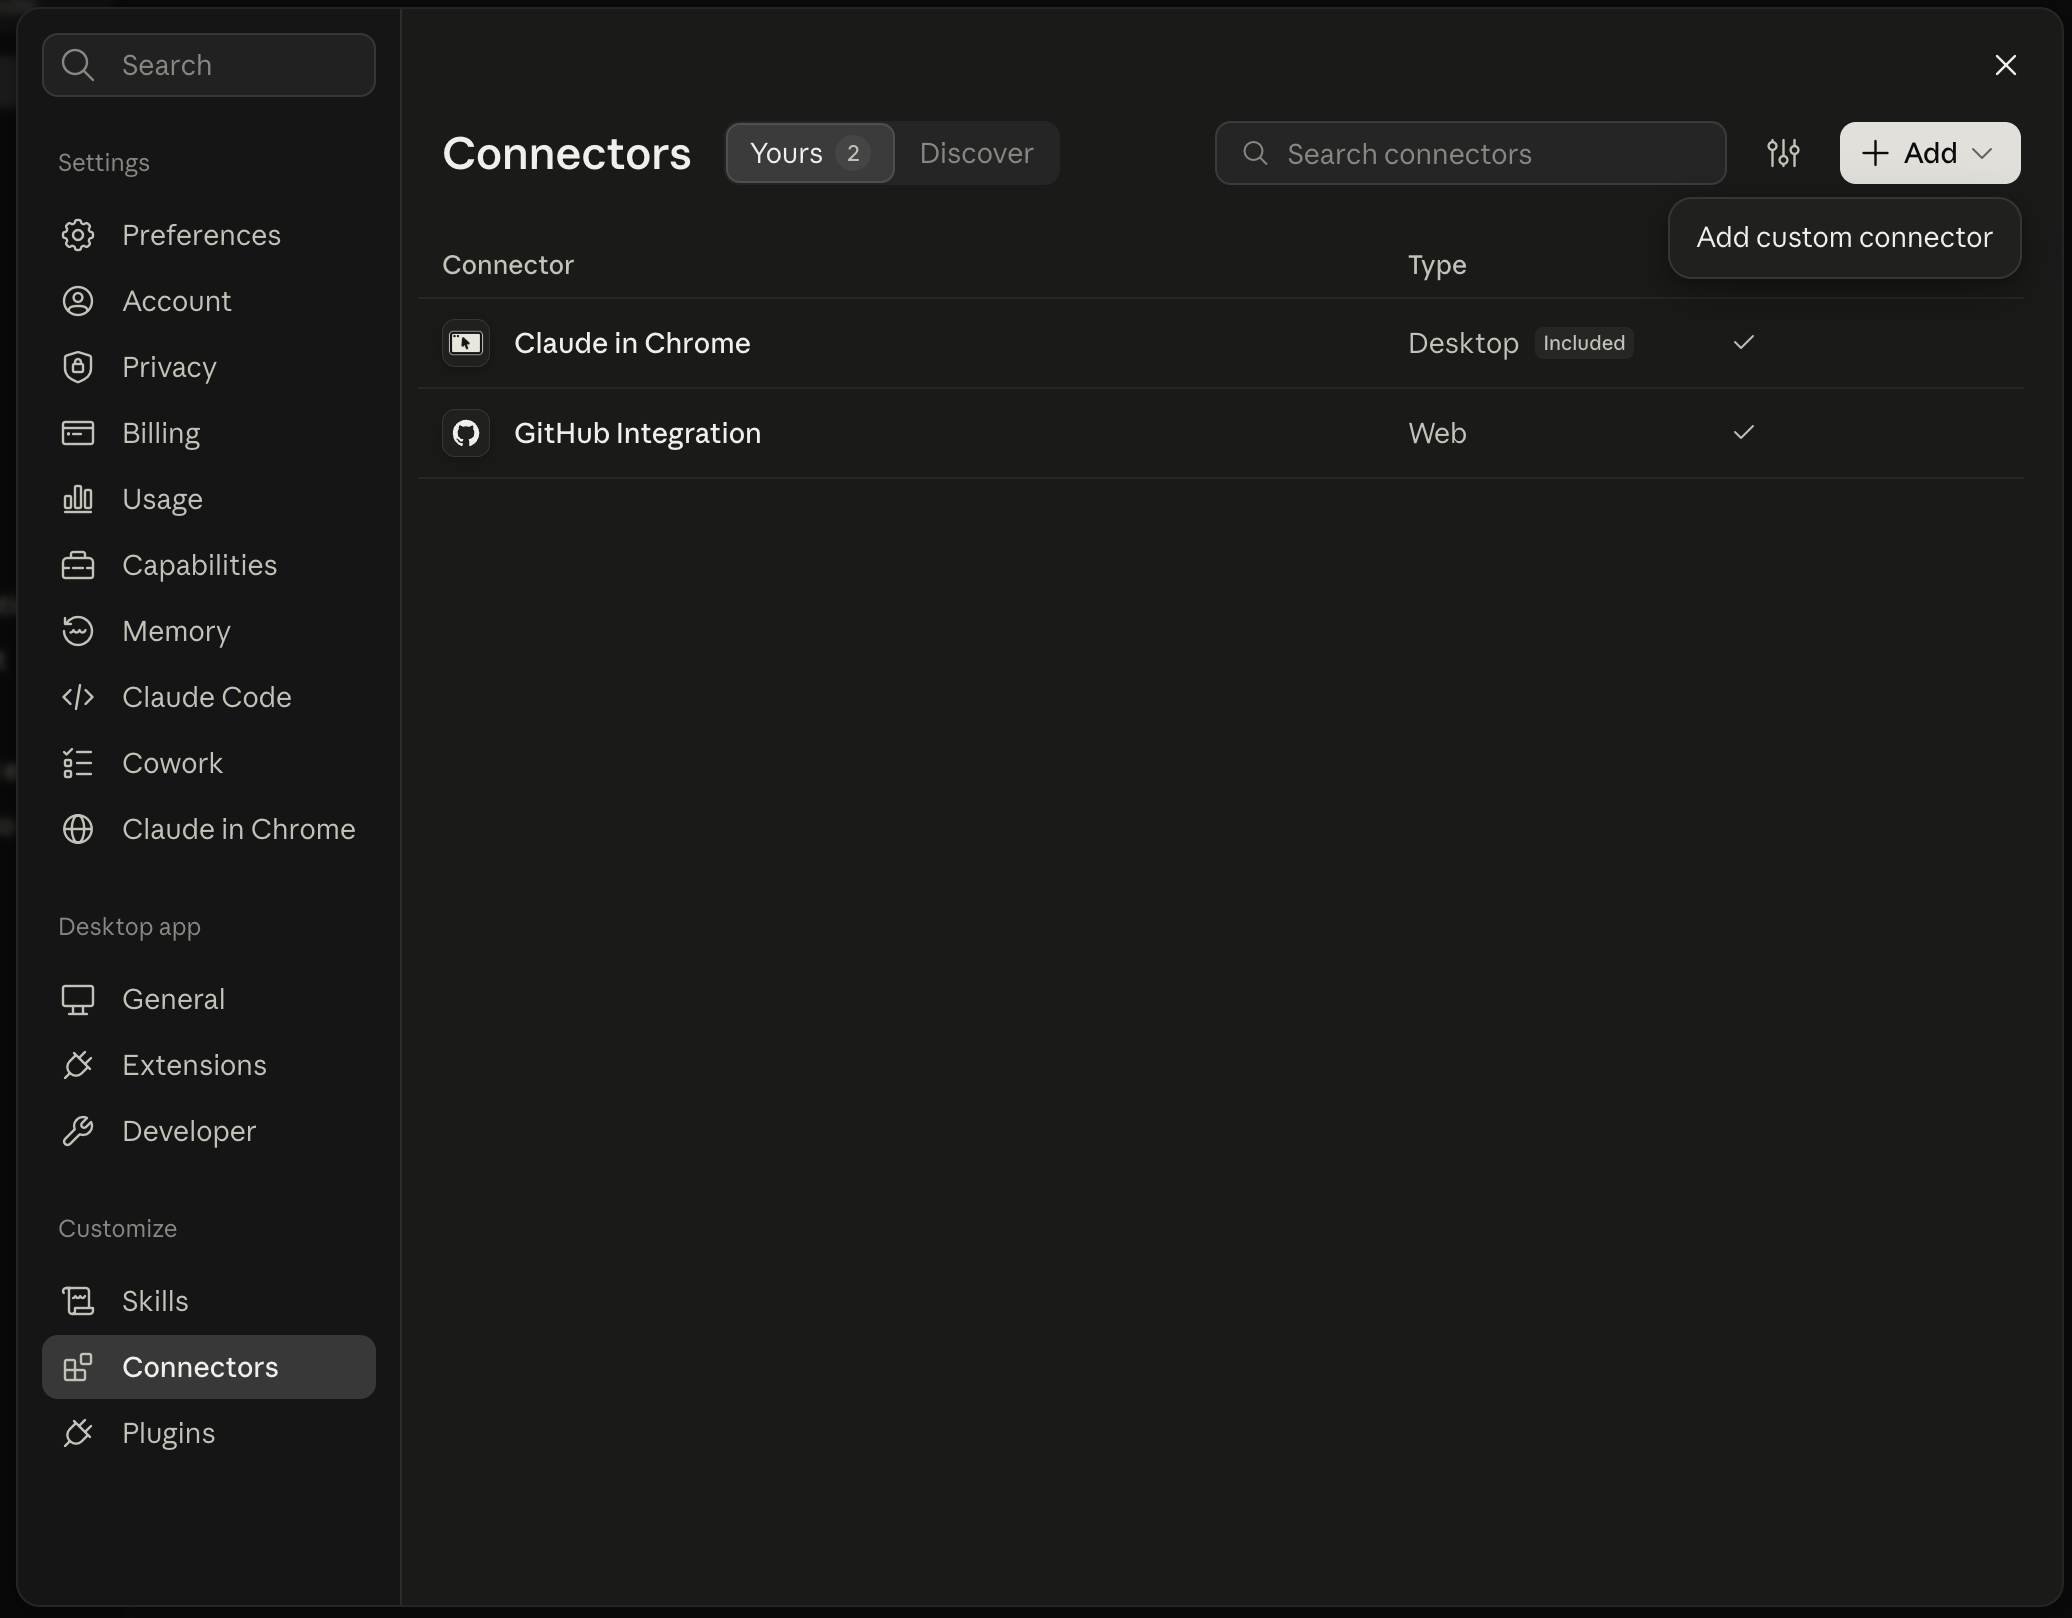
1. Open Connectors
Go to Settings → Connectors, then click + Add → Add custom connector.
2. Enter the server details
- Name:
Kuberns - URL:
https://mcp.kuberns.cloud/mcp
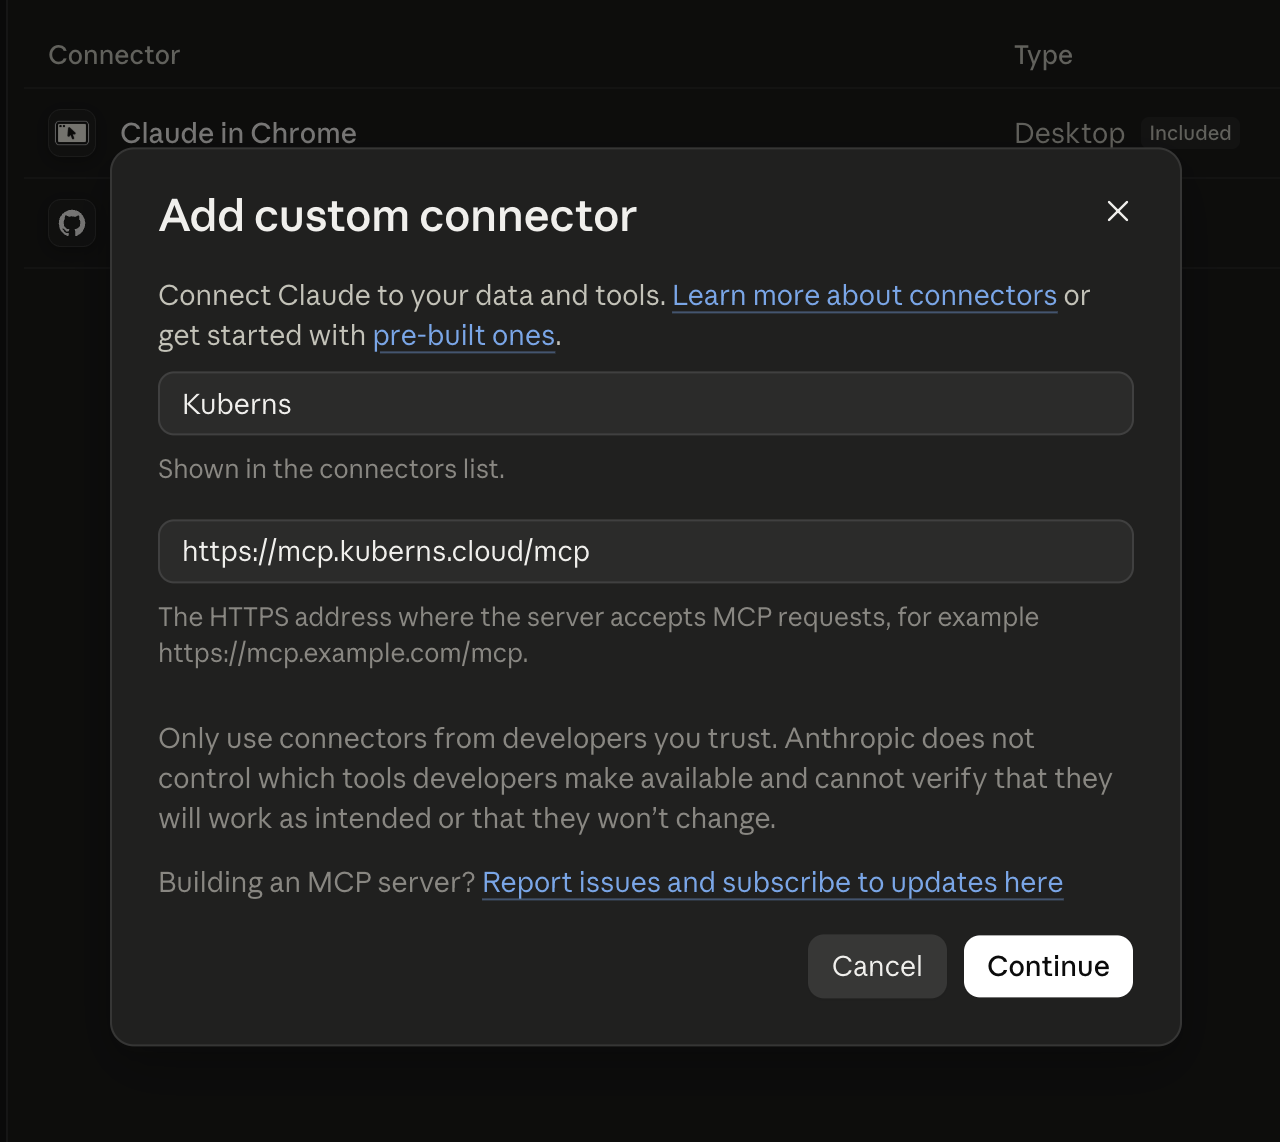
Click Continue.
3. Confirm authentication settings
Claude auto-detects the right settings for Kuberns — leave them as-is:
- Authentication: Sign in now (detected)
- OAuth client: Register automatically (detected)
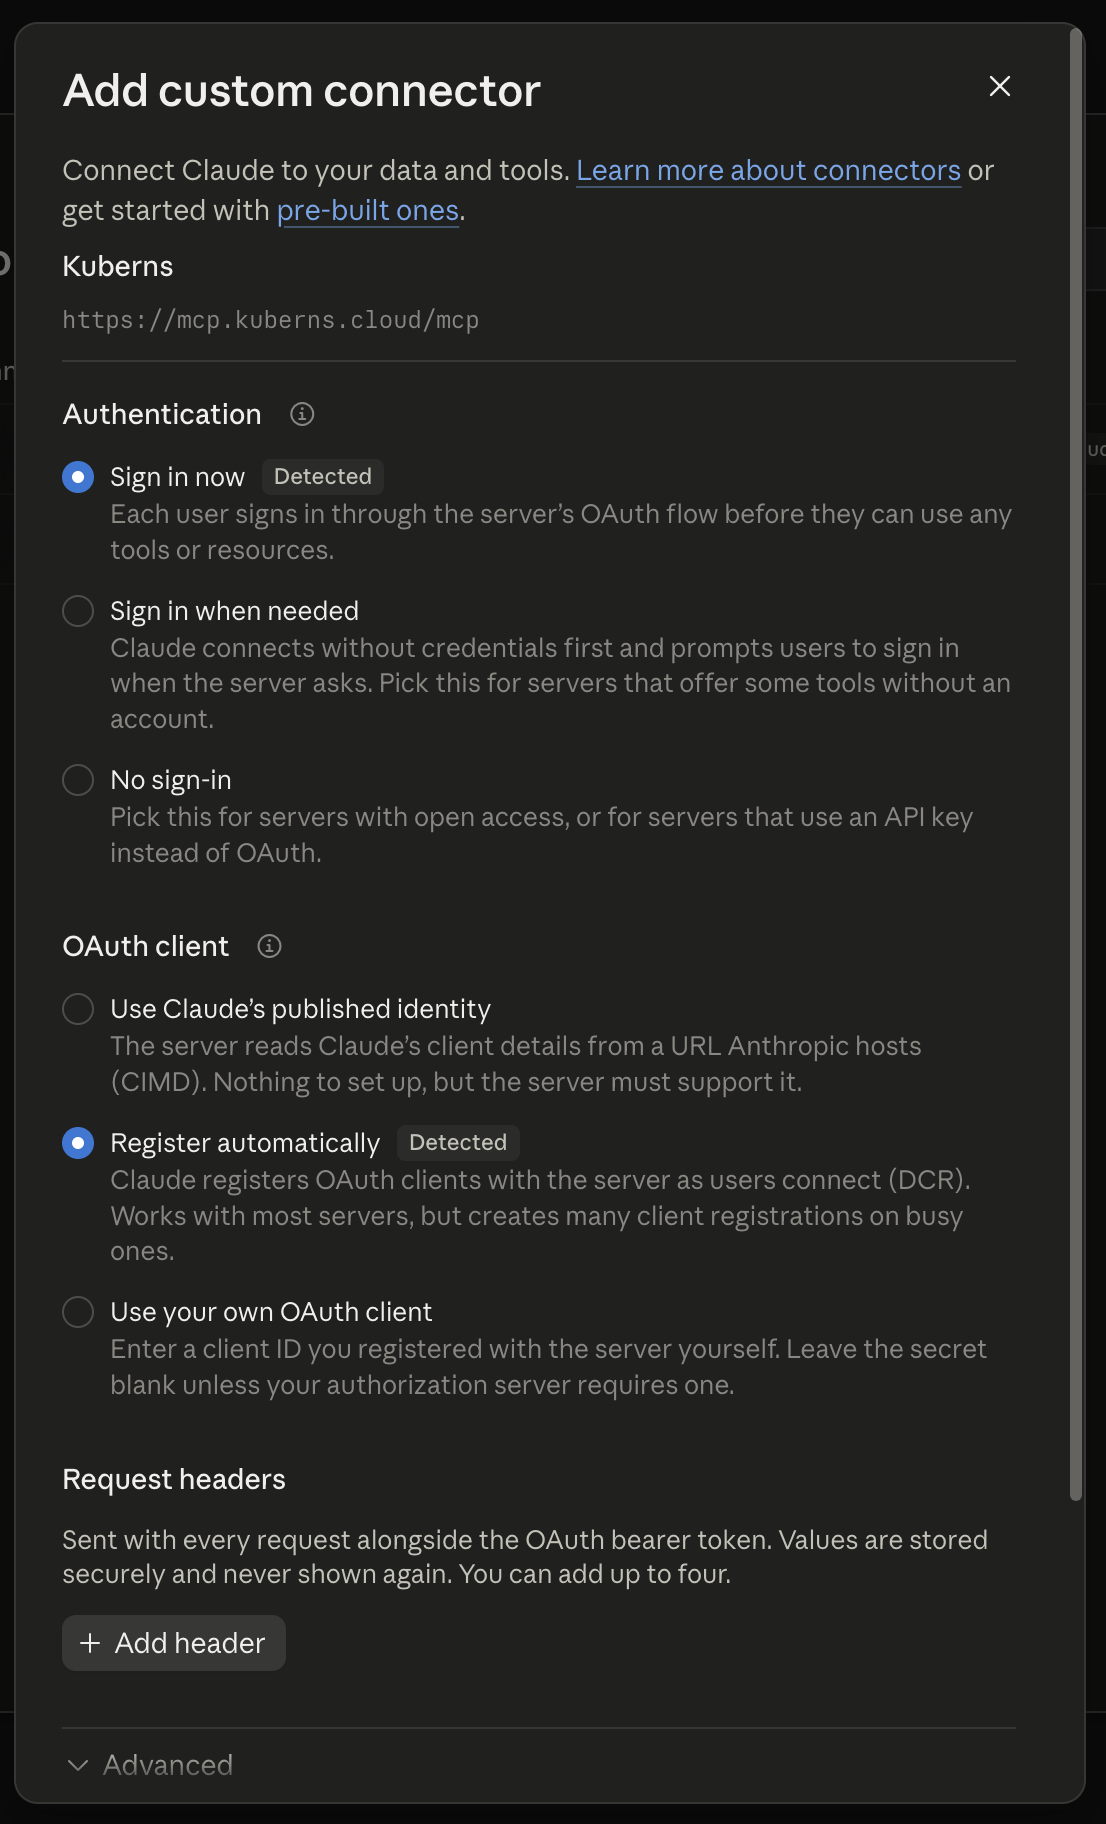
Scroll down and click Add.

4. Connect
Kuberns now appears in your connectors list, not yet connected.
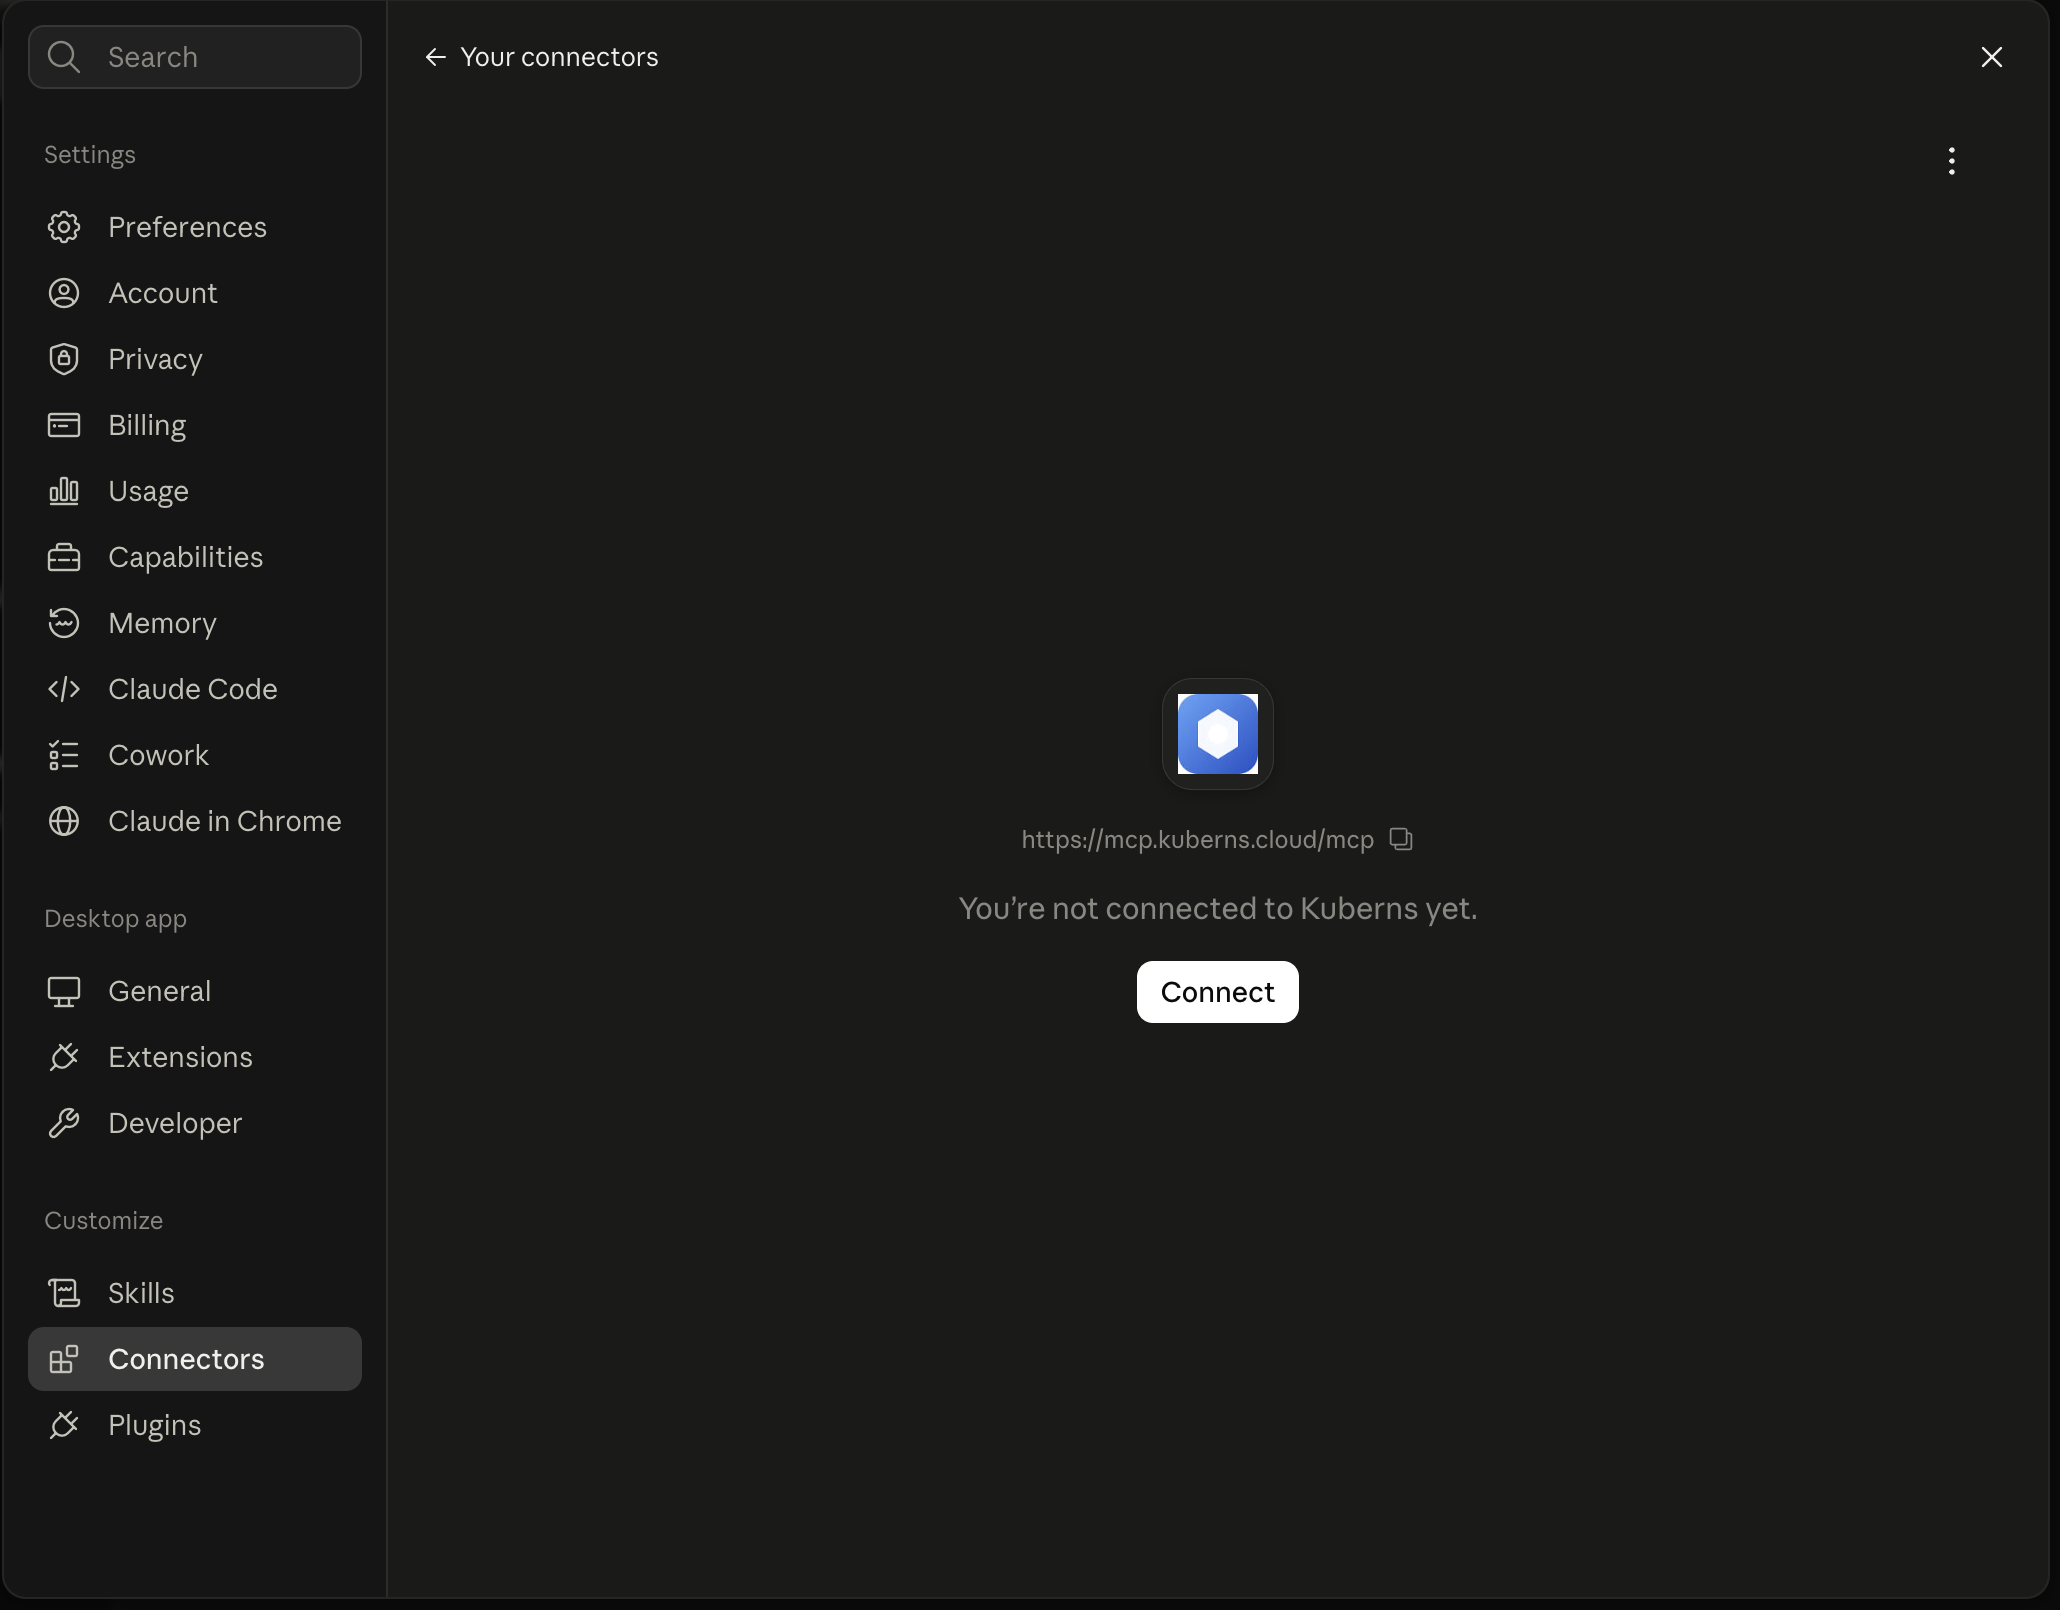
Click Connect. Your browser opens to Kuberns' consent screen.
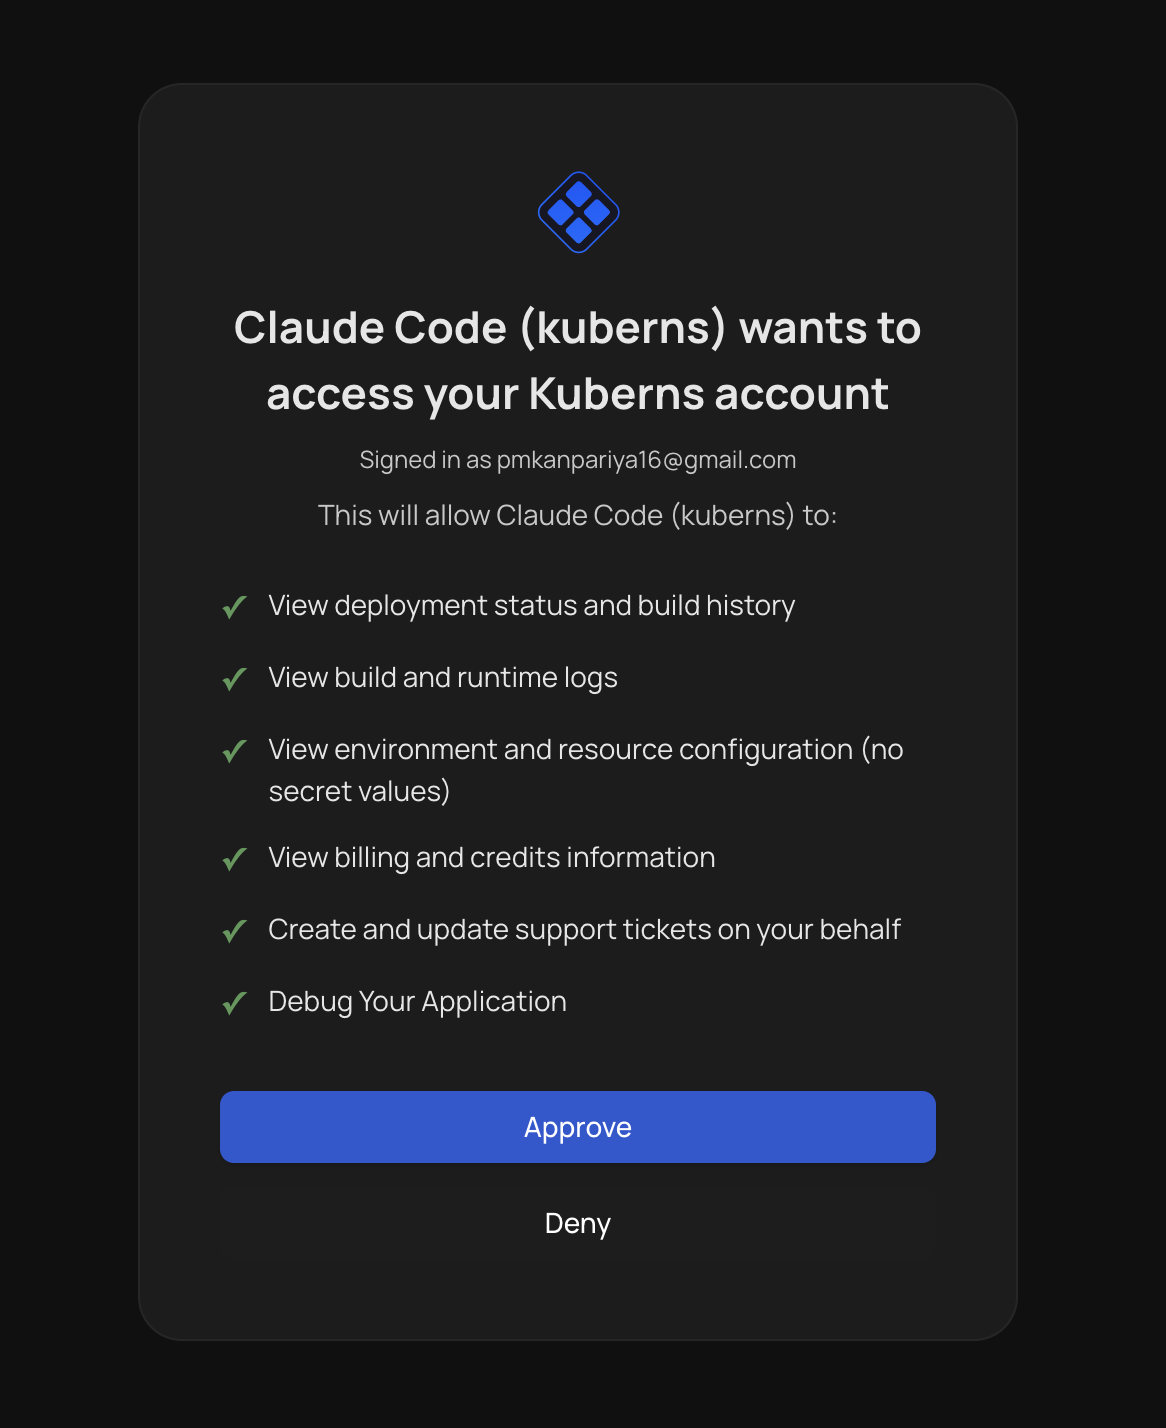
Click Approve.
5. Confirm it worked
Ask Claude something simple, like "List my Kuberns projects," to confirm it's live.